From Amateur to Pro: Tips for Making a Good Video

Make a good video quickly and effectively with these simple strategies:
- Plan Your Message: Clearly define what you want to convey. This sets the foundation for your entire video.
- Focus on Storytelling: Engage your viewers with a compelling narrative that's authentic and relatable.
- Invest in Quality Production: Good lighting and sound significantly lift your video's quality—never underestimate them.
- Showcase Authenticity: Let your personality shine through. Audiences connect more with genuine content.
- Call to Action: Always guide your viewers on what to do next, such as visiting your website or sharing your video.
Video production is more than just shooting footage. For non-profits, it’s about crafting narratives that resonate and make a true impact. Picture this: your organization has a powerful message but limited means to spread it widely. By mastering video storytelling, you can amplify your mission and create measurable results. Effective videos can spark donations, boost community involvement, and drive awareness—especially when your resources for content production are stretched thin.
Through video, non-profits have a valuable tool to bring stories of social change to life. Whether your focus is advocacy, diversity, equity, inclusion, or environmental justice, professional-looking videos are essential. They can help lift your narrative to engage both national audiences and local communities.

Explore more about make a good video:
Planning Your Video
Planning is the cornerstone of creating a good video. It ensures that your message is clear, your visuals are engaging, and your production runs smoothly. Let's explore the key aspects of video planning: storyboarding, scripting, and location scouting.
Storyboarding
Think of storyboarding as creating a visual roadmap for your video. It’s like a comic strip for your content. Each frame represents a scene, helping you visualize how your video will unfold. This step is crucial because it allows you to plan the sequence of events, ensuring a logical flow and consistency.
Why Storyboard? It helps you spot potential issues early, saving time and resources during filming.
How to Create a Storyboard: You don't need to be an artist. Simple sketches or even stick figures can work. Focus on capturing key actions, camera angles, and transitions.
Scripting
A well-crafted script is the backbone of any successful video. It guides what you say and how you say it, ensuring your message is delivered clearly and effectively.
Drafting Your Script: Start with a bullet-point outline of your key messages. Then, expand these into full sentences. Keep your language simple and conversational.
Rehearse and Revise: Practice your script aloud. This helps identify awkward phrases or complex sentences that might trip you up on camera. Revise until it feels natural and engaging.

Location Scouting
Your video's setting can greatly influence its tone and effectiveness. Choosing the right location is like picking the perfect canvas for a painting.
Consider Your Message: The location should complement your video's theme. For instance, a serene park might suit a wellness video, while a busy kitchen is ideal for a cooking tutorial.
Check Lighting and Sound: Natural light is your friend, but be mindful of shadows and glare. Also, listen for background noise that could disrupt your audio quality.
Practicality Matters: Ensure the location is accessible and has the necessary amenities, like power outlets for your equipment.
By investing time in planning through storyboarding, scripting, and location scouting, you set the stage for a smooth production process. These steps not only improve the quality of your video but also ensure that your content resonates with your audience.
Next, let's explore the art of lighting to make a good video look professional and polished.
Make a Good Video with Proper Lighting
Lighting is the secret sauce to make a good video look professional. It shapes the mood, highlights your subject, and ensures your video stands out. Let's explore how to use lighting effectively.
Natural Light
Natural light is a filmmaker's best friend. It's soft, flattering, and free! Position your subjects near windows or shoot outdoors during the morning or evening for the best results. These times offer softer light, reducing harsh shadows that can occur in the midday sun.
Plan Around the Sun: The "golden hour," just after sunrise or before sunset, provides a warm, soft glow perfect for filming.
Be Prepared for Changes: Natural light can be unpredictable. Clouds, time of day, and weather can all affect your lighting. Always have a backup plan, like portable reflectors, to manage these changes.
Soft Lighting
Soft lighting reduces harsh shadows and creates a more even, flattering look. It’s ideal for interviews or close-up shots where you want your subject to look their best.
Use Diffusers: Softboxes or light diffusers can help soften artificial light, spreading it evenly across your scene.
Positioning Matters: Place your light source at an angle to your subject to avoid flat lighting and add depth to your video.
Three-Point Lighting
Three-point lighting is a classic technique that adds dimension to your video, making it look polished and professional. It involves three lights: Key Light, Fill Light, and Back Light.
Key Light: This is your main light source. It should be placed to one side of your subject to create shadows and depth.
Fill Light: Positioned on the opposite side of the key light, the fill light softens shadows created by the key light. It’s usually less intense.
Back Light: Also known as the rim or hair light, this light is placed behind the subject. It helps separate the subject from the background, adding a three-dimensional feel.

By mastering these lighting techniques, you can transform your video from amateur to pro. Proper lighting not only improves the visual quality but also supports the story you're telling. Up next, we'll dig into ensuring high-quality audio and visuals to further lift your video production.
Ensuring High-Quality Audio and Visuals
Once you've nailed the lighting, the next step to make a good video is ensuring your audio and visuals are top-notch. Let's explore how to achieve clear audio and sharp visuals.
Clear Audio
Audio quality can make or break your video. Even if your visuals are stunning, poor audio can drive viewers away.
External Microphones: Built-in microphones on cameras or phones often fall short. For crisp sound, invest in a good external microphone. Options like shotgun mics or lavalier mics can significantly improve audio clarity.
Positioning is Key: Place the microphone as close to the sound source as possible. This minimizes background noise and ensures the main audio is clear and strong.
Monitor Background Noise: Be aware of ambient sounds like traffic or wind, which can be distracting. A pop filter can help reduce unwanted noise, keeping your audio clean.
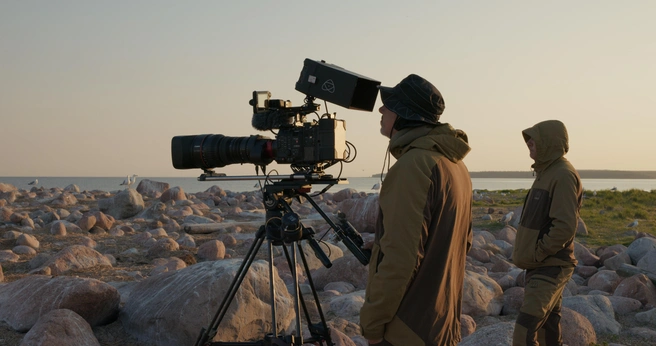
High-End Equipment
Using quality equipment is crucial for professional-looking videos.
Cameras and Lenses: Invest in a decent camera with manual settings. This gives you control over focus, exposure, and other settings critical for high-quality visuals.
Tripods: To avoid shaky footage, use a tripod. It keeps your camera steady and your shots smooth, enhancing the overall viewing experience.
Video Quality: Aim for at least 1080p resolution. This ensures your video looks sharp on most screens. If possible, shoot in 4K for even higher quality.
Manual Focus
Autofocus can be handy, but it’s not always reliable for video.
Control Your Focus: With manual focus, you decide what stays sharp. This is especially useful if your subject is moving or if there are multiple objects in the frame.
Practice Makes Perfect: Manual focusing takes practice. Spend time learning how to adjust focus smoothly, so your transitions look professional.
By focusing on these elements, you'll ensure your video not only looks great but sounds fantastic too. High-quality audio and visuals are essential for keeping your audience engaged and delivering your message effectively. Next, we’ll explore editing techniques for a polished look.
Editing Techniques for a Polished Look
Once you have your footage, the next step in your journey to make a good video is editing. Editing transforms your raw footage into a captivating story. Let's explore how simple editing, the rule of thirds, and the right editing software can help you achieve a polished look.
Simple Editing
Keep it Clean: While it’s tempting to use flashy effects, simplicity often wins. A clean, straightforward editing style looks professional and keeps the focus on your content.
- Trim and Cut: Remove awkward pauses or unnecessary segments. This keeps your video concise and engaging.
- Transitions: Use smooth transitions between scenes. Keep them subtle to maintain a professional vibe.
Pro Tip: Cut scenes during motion for a natural flow. This technique makes transitions less jarring and more seamless.
Rule of Thirds
The rule of thirds is a fundamental concept in film composition. Imagine a 3-by-3 grid over your video frame. Placing your subject along these lines or at their intersections improves visual interest.
- Balanced Composition: This technique helps in framing shots that are visually balanced and naturally pleasing.
- Focus Points: Use the grid intersections for key elements, drawing the viewer’s attention.
Visual Aid: Consider overlaying a grid on your camera screen to help you frame shots effectively.
Editing Software
Choosing the right editing software can greatly impact your video’s quality. Look for software that offers essential features without overwhelming complexity.
- User-Friendly Tools: Programs with drag-and-drop timelines and intuitive interfaces are ideal for beginners.
- Key Features: Ensure the software allows text additions, trimming, cropping, and scene transitions. Filters and overlays can also improve your video's style.
Fun Fact: Many professional editors started with simple tools before moving to advanced software. The key is to master the basics first.
By focusing on these editing techniques, you’ll be well on your way to creating polished, professional-looking videos. Next, let's dig into how to engage your audience effectively.
Engaging Your Audience
Creating a video isn't just about capturing and editing; it’s about keeping your audience hooked from start to finish. Let's break down three essential techniques to make a good video that engages viewers: on-screen presence, multiple angles, and time limits.
On-Screen Presence
Your on-screen presence can make or break viewer engagement. Appearing confident and natural helps you connect with your audience.
- Body Language: Stand tall with open body language. Avoid crossing your arms as it can seem uninviting.
- Facial Expressions: A genuine smile, especially at the beginning, sets a friendly tone.
- Speech: Speak clearly and at a steady pace. Enunciate your words and use your diaphragm for a strong voice.
Practice Makes Perfect: Rehearse in front of a mirror or record yourself to identify areas for improvement. Over time, you'll become more comfortable and engaging on camera.
Multiple Angles
Using multiple angles adds visual interest and keeps viewers engaged. It’s especially useful in tutorials or demonstrations.
- Variety of Shots: Change perspectives by at least 45 degrees to avoid jarring transitions.
- B-Roll Footage: Capture extra footage from different angles to improve storytelling.
- Dynamic Movement: Incorporate movement by panning or tilting the camera for added dynamism.
Pro Tip: Before filming, create a shot list to ensure you capture all necessary angles. This preparation saves time and improves your video’s flow.
Time Limits
Attention spans are short, so keep your content concise. Knowing when to trim or extend a scene is crucial.
- Ideal Length: Aim for shots between five to ten seconds. This holds attention without overwhelming the viewer.
- Avoid Rambling: Break long sections into shorter clips to maintain focus and clarity.
- Edit Ruthlessly: Remove any content that doesn’t add value. Every second should serve a purpose.
Fun Fact: The average attention span is about 8.5 seconds. Crafting your video with this in mind helps maintain viewer interest.
By mastering these techniques, you’ll ensure your videos are not only polished but also engaging. Up next, we'll dig into some frequently asked questions about video production to further improve your skills.
Frequently Asked Questions about Video Production
What are the 3 stages of video production?
Creating a video is like building a house; you need a solid foundation before you start decorating. The three stages of video production are key to creating a successful video.
Pre-Production
This is your planning phase. It's where you storyboard, script, and scout locations. Think of it as drawing up blueprints for your video. The more detailed your plan, the smoother the rest of the process will be.Production
Lights, camera, action! Here, you capture all your footage. With your pre-production plan in hand, you can focus on getting the best shots and clear audio. Good technique and equipment are important, but creativity and flexibility are your best tools.Post-Production
This is where the magic happens. You edit your footage, add music, and polish your video. Simple editing and following the rule of thirds can make a big difference. Use editing software to improve your visuals and audio, creating a seamless final product.
How can I improve my video skills?
Improving your video skills is like learning to ride a bike. The more you practice, the better you get.
Practice Regularly
The more videos you make, the more you'll learn. Try different styles and techniques to see what works best for you.Use the Right Software
Choose software that suits your needs and skill level. Many apps offer tutorials and templates to help you get started.Plan Your Videos
A well-thought-out plan makes the production process smoother. Define your video's purpose and audience, then write a script and create a storyboard. Planning helps you stay focused and organized.
What makes a video more interesting?
An interesting video is like a good book; it keeps you hooked from start to finish. Here are some tips to make your video stand out:
Central Points
Focus on two or three key messages. Too many points can confuse your audience. Keep it simple and clear.Narrative
Storytelling is powerful. Use conflict, resolution, and character development to create an emotional connection with your viewers.Engagement
Keep your audience engaged with a strong on-screen presence, multiple camera angles, and concise editing. Each element should serve to improve the viewer's experience.
By understanding these stages and techniques, you'll be well on your way to creating videos that captivate and inform. Now, let's dive deeper into digital storytelling and its social impact.
Conclusion
At Narratives, we believe in the power of digital storytelling to create meaningful change. Our mission is to lift underrepresented voices and help non-profits tell their impact stories in a way that inspires action and builds trust. Through high-quality, emotionally resonant video and multimedia content, we aim to increase visibility for these important causes.
Digital storytelling is more than just making a good video. It's about crafting narratives that connect with audiences on a deeper level. By focusing on social impact, we help organizations share their stories in a way that resonates with viewers and encourages them to get involved.
Our approach is simple: we partner with non-profits to create content that highlights the communities they serve. By showcasing the human side of these stories, we aim to foster empathy and understanding, driving real-world change.
If you're ready to amplify your organization's message and make a difference, learn more about how Narratives can help. Together, we can harness the power of storytelling to create a better world.

.png)